How to create IPsec tunnel in pfsense
IPsec is one of the protocols for establishing secure site to site tunnels and here we show how to create IPsec tunnel in pfsense.
We use latest pfsense community edition. to download it you can head over to download pfsense.
Here is our environment:
2 pfsense on VMware
Public IP range: 192.168.143.0/24
Private IP ranges: 172.24.9.0/24 and 172.24.7.0/24
Topology:

1. Configure IPsec on pfsense 1
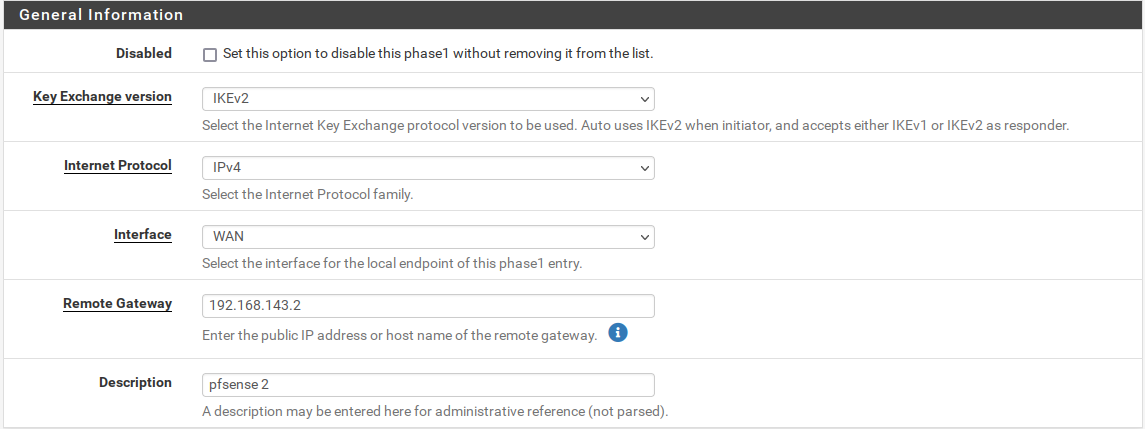
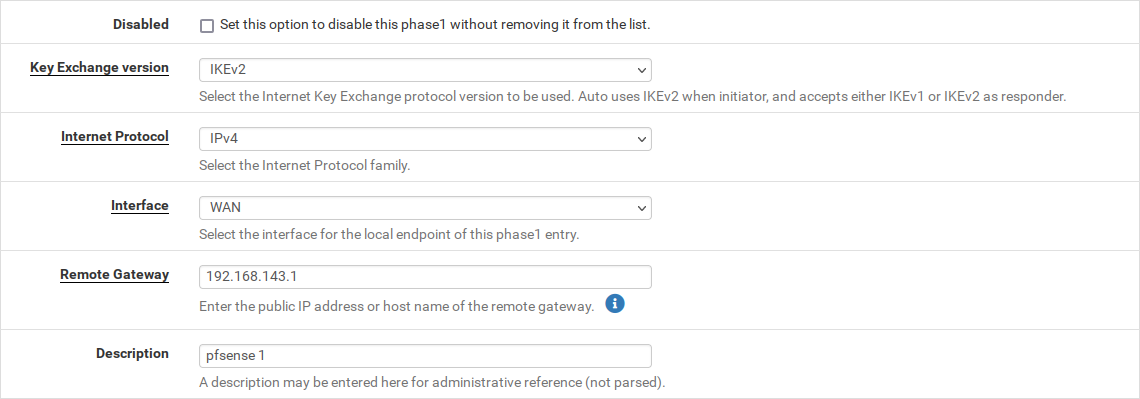
1.1 IPsec phase 1
In phase 1 we configure authentication and encryption modes and algorithms.
to create IPsec tunnel on left side pfsense, we navigate to “VPN > IPsec” and and click on Add P1:
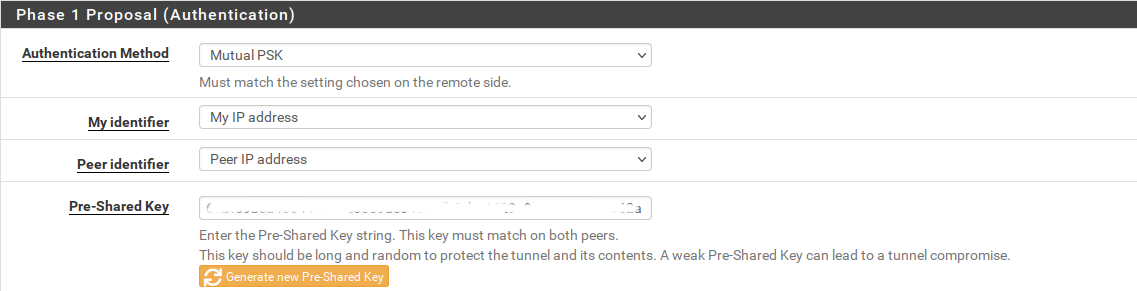
Now we click on “Generate new Pre-Shared” Key to generate a new one. we use this key when we configure Phase 1 on right side pfsense:
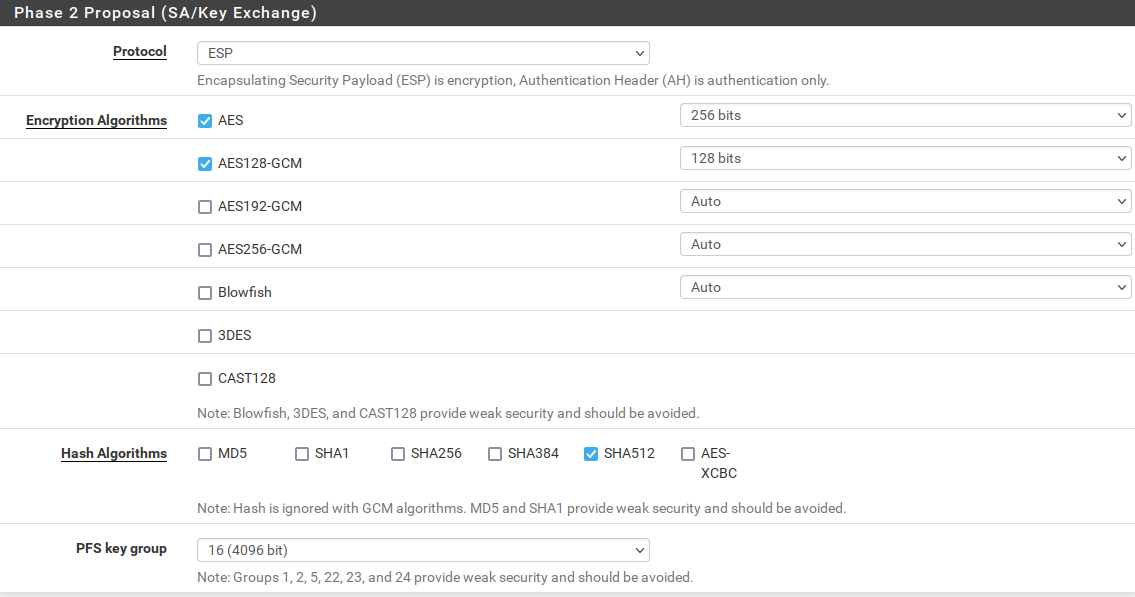
Now we configure encryption algorithm. the high values mean the more security but it uses more CPU resource.


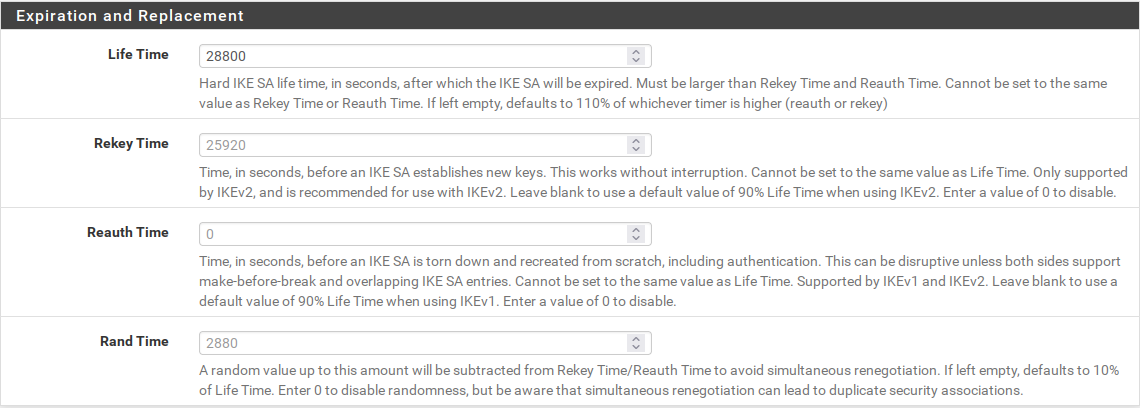
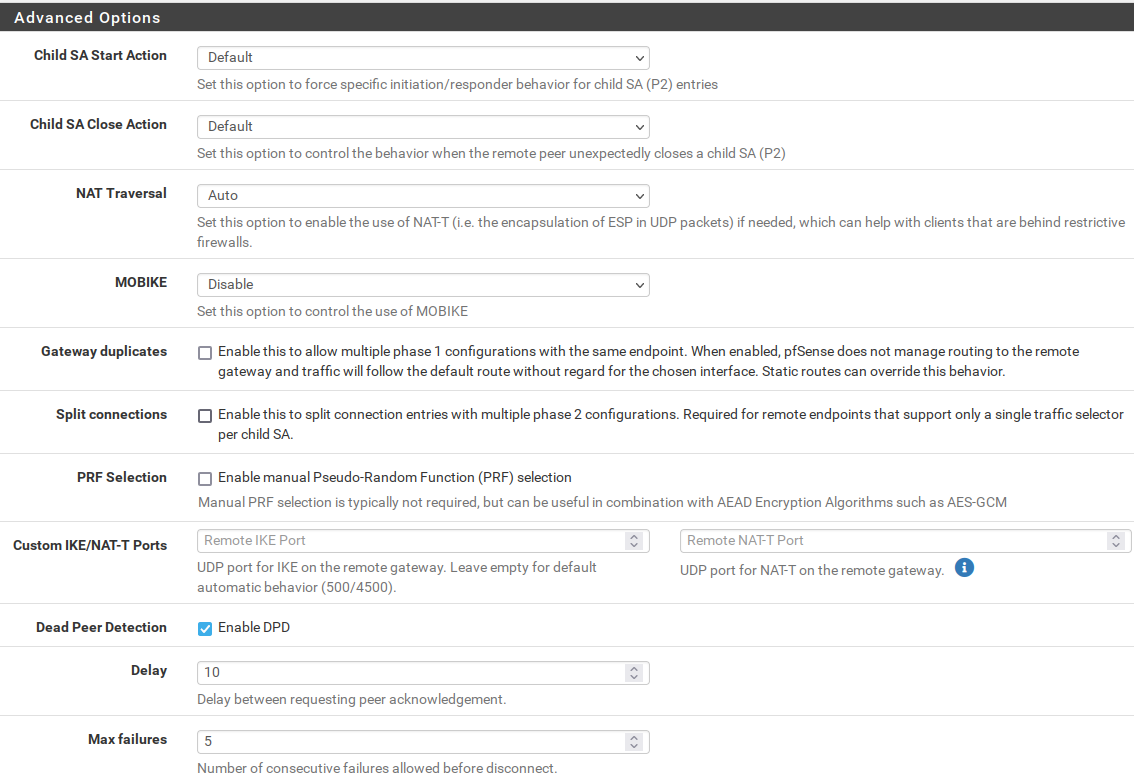
And we leave the rest of configurations intact:

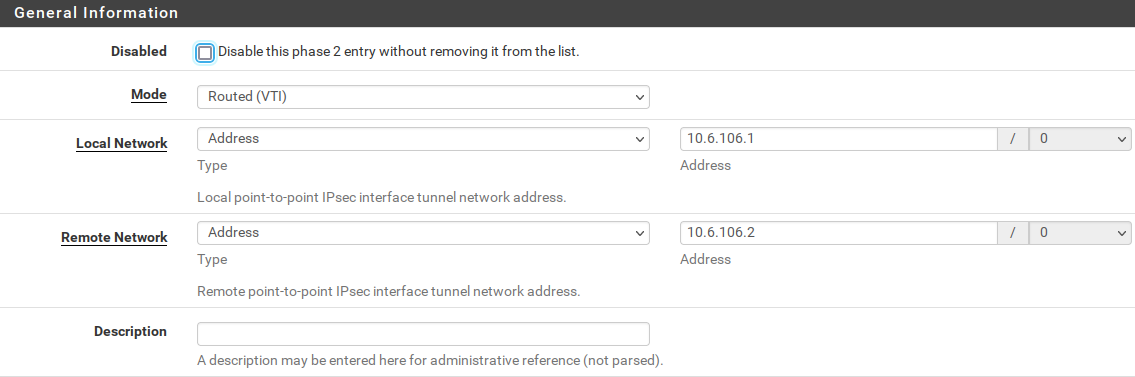
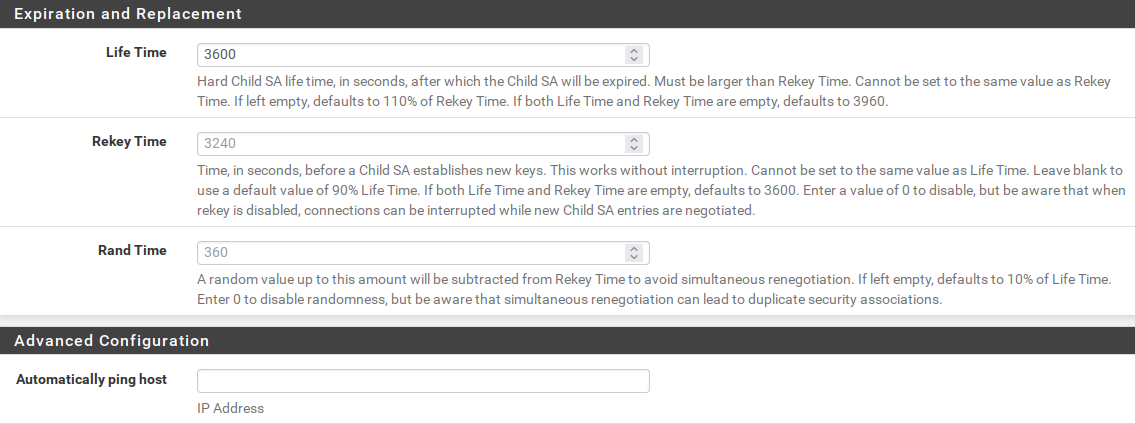
1.2 IPsec phase 2
In phase 2 we configure IP address for two sides of tunnel. also we set “Mode” to “Routed (VTI)”, because it creates an interface that we can define custom routes based on it:

1.3 Enable VTI interface
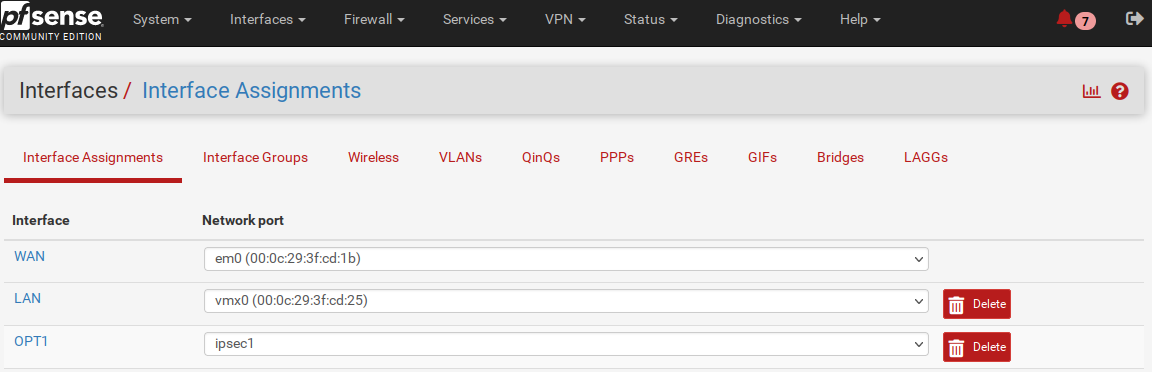
Now we navigate to “Interfaces > Assignments” and add the new interface related to IPsec:
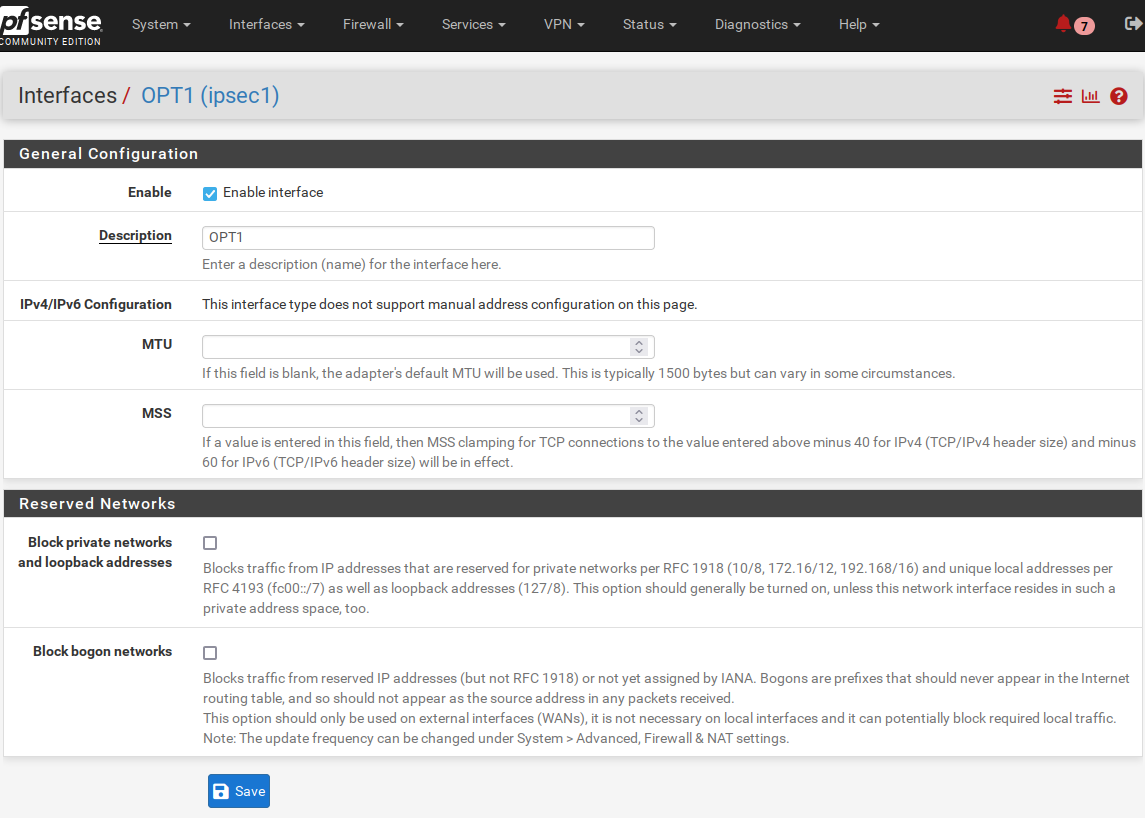
Then we navigate to “Interfaces > OPT1” and enable it
1.4 Routing
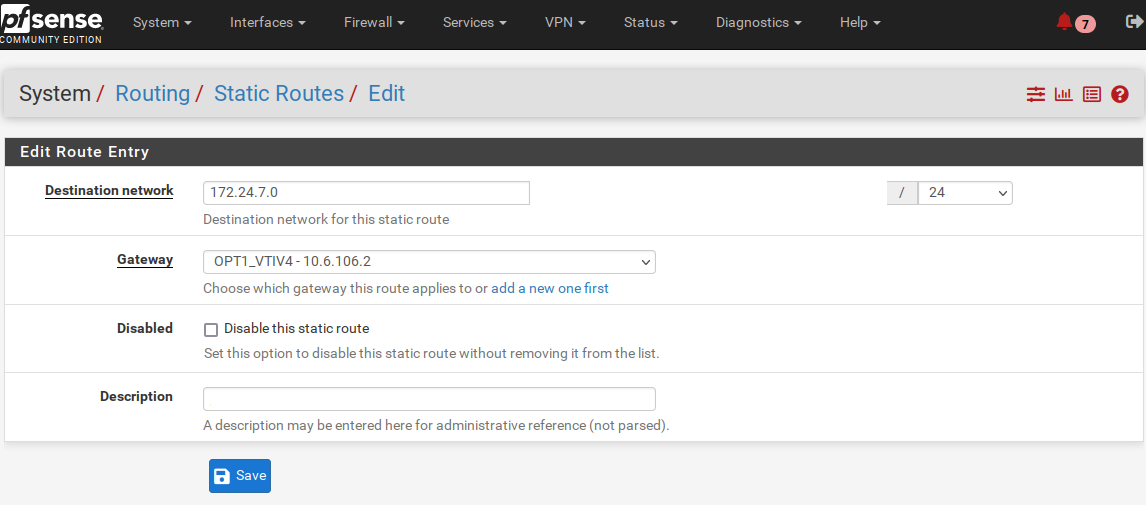
Now we navigate to “System > Routing” and add required routes
1.5 Firewall
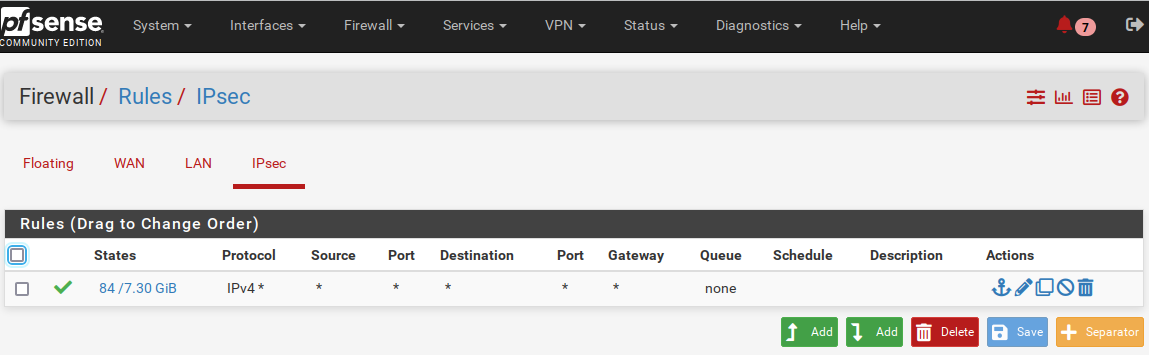
The final step in configuration is to add required firewall rule to allow traffic in IPsec tunnel
2. Configure IPsec on pfsense 2
2.1 IPsec phase 1
to create IPsec tunnel on right side pfsense, we navigate to “VPN > IPsec” and and click on Add P1:
Now we put Pre-Shared Key that we created in step 1.1:

the rest of configurations MUST be the same as left side pfsense:

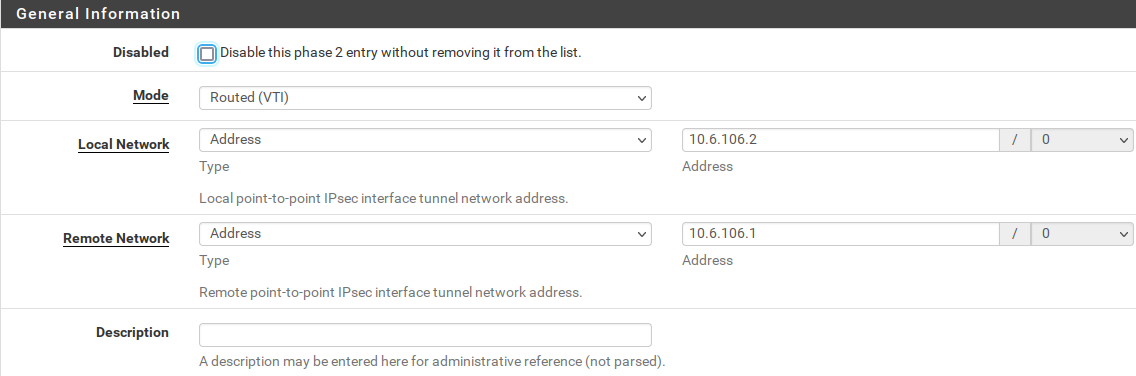
2.2 IPsec phase 2
Now we navigate to “VPN > IPsec” to configure phase 2 of created phase 1

2.3 Enable VTI interface
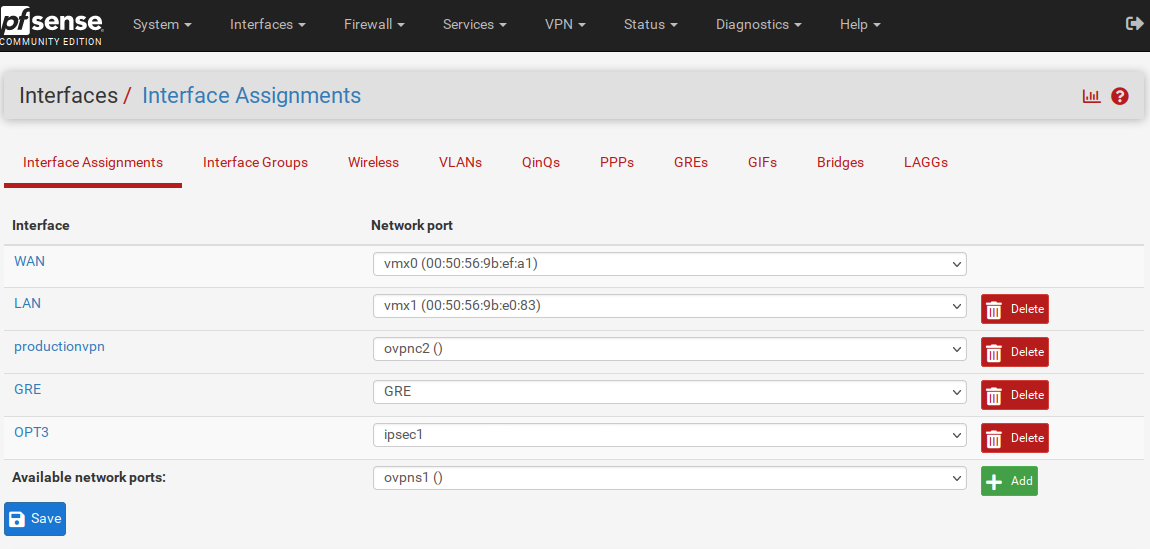
Now we navigate to “Interfaces > Assignments” and add the new interface related to IPsec:
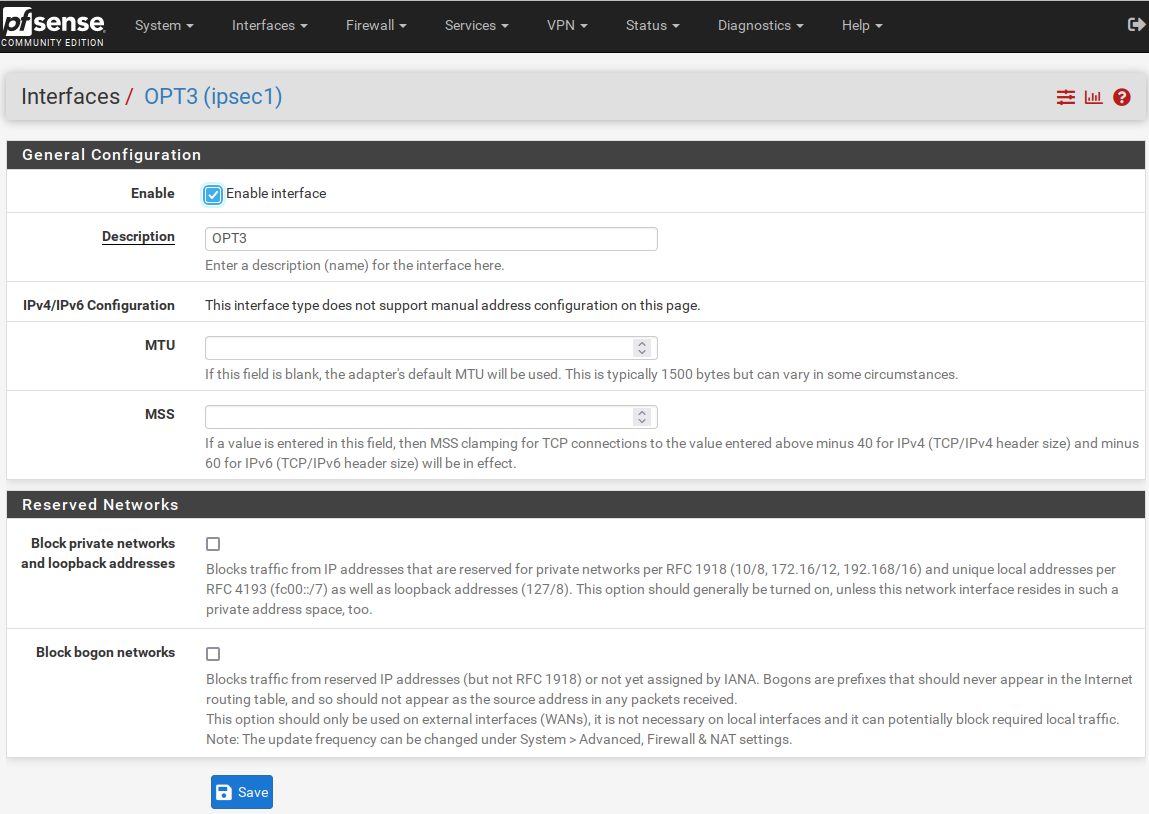
Then we navigate to Interfaces > OPT3 and enable it:
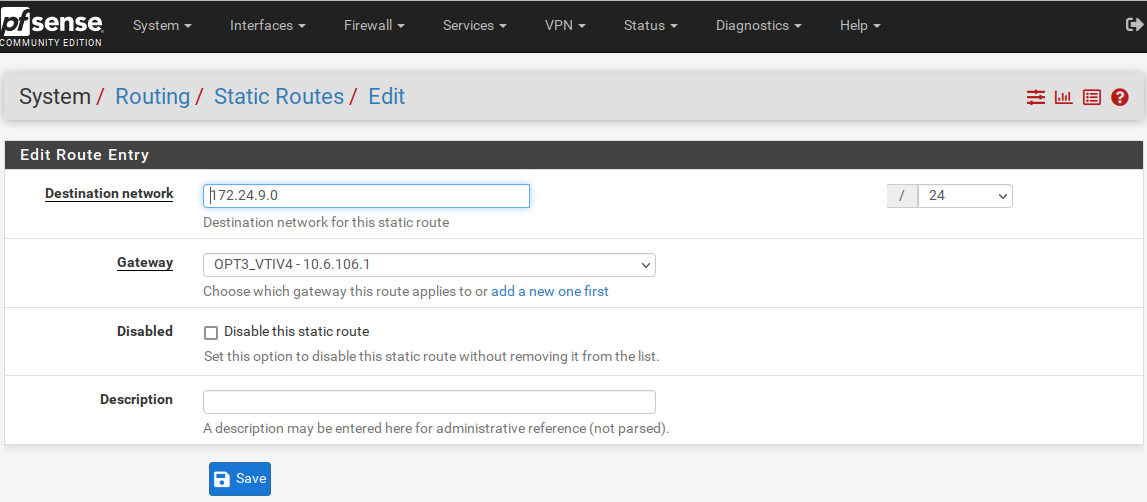
2.4 Routing
Now we navigate to “System > Routing” and add required routes:
2.5 Firewall
The final step in configuration is to add required firewall rule to allow traffic in IPsec tunnel:

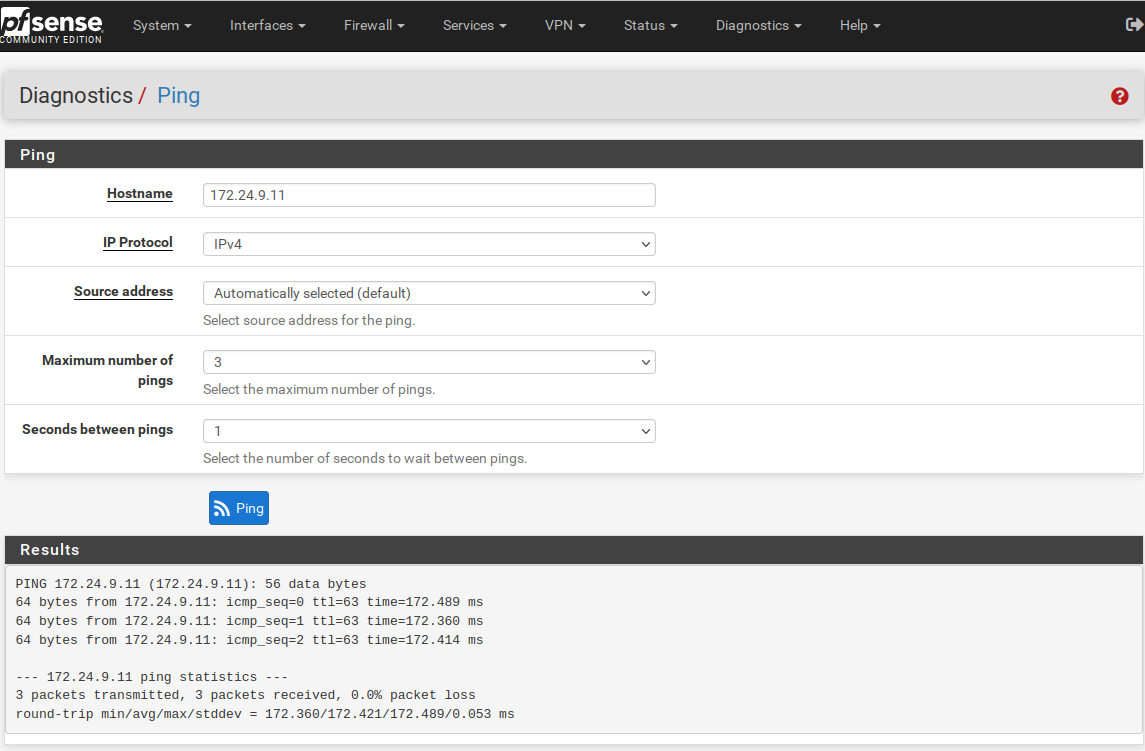
3. Check connectivity
Now on pfsense 1 we can use “Diagnostics > Ping” to ping 172.24.7.0/24 and on pfsense 2 ping to 172.24.9.0/24: